Install Legacy From Bootable USB
Introduction
This is the current recommended method for beginners!
We recommend beginners to use this method as it is the least error-prone and non-destructive. The following instructions were adapted from the Android-x86 project, so some of the images are from them. To look at Android-x86's original installation guide, click here.
Download Bliss OS
You can download a stable Bliss OS build from the website here.
Bios Setup
You will need to update a couple configs in your PC BIOS:
- Disable TPM (drive encryption)
- Disable Secure Boot
- Make sure drive access is set to AHCI
Install Bliss OS To It's Own Partition
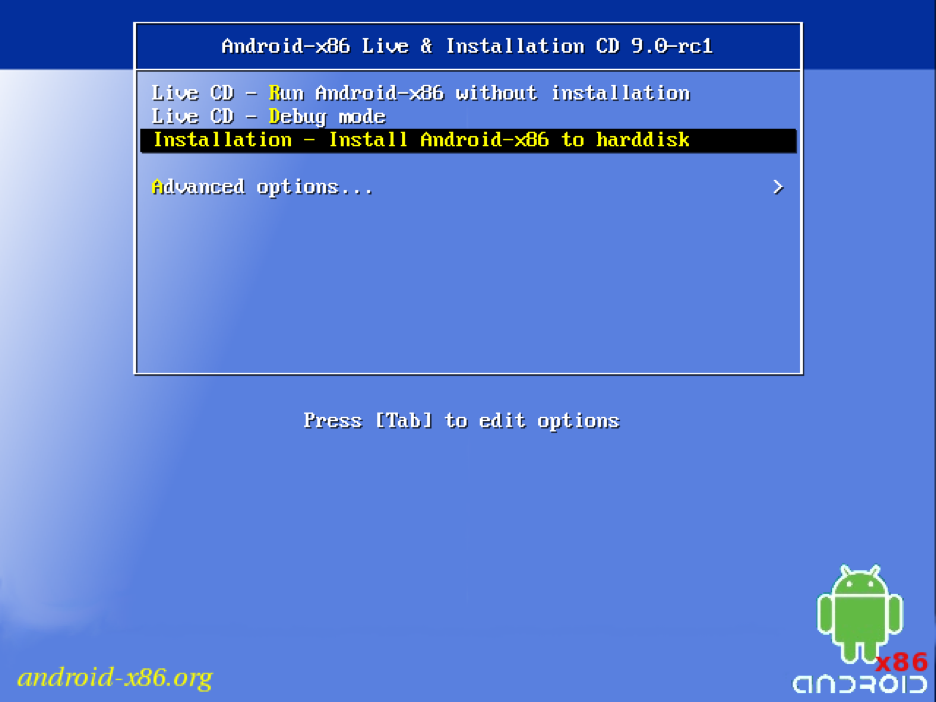
When booting into the installer, choose "Installation - Install Android-x86 to harddisk":
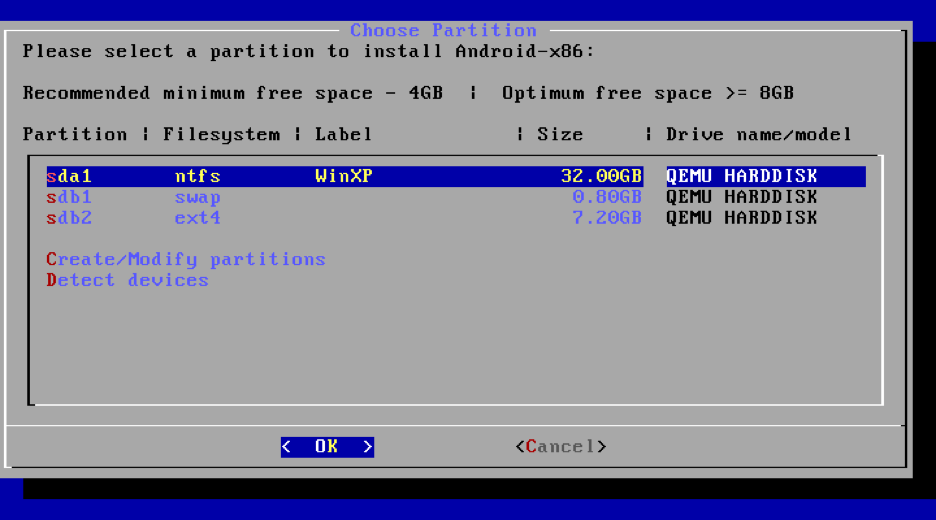
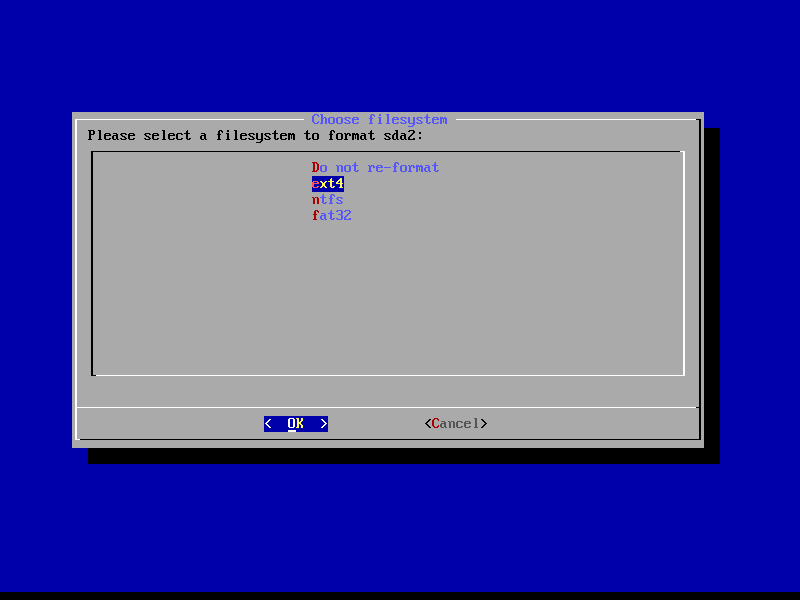
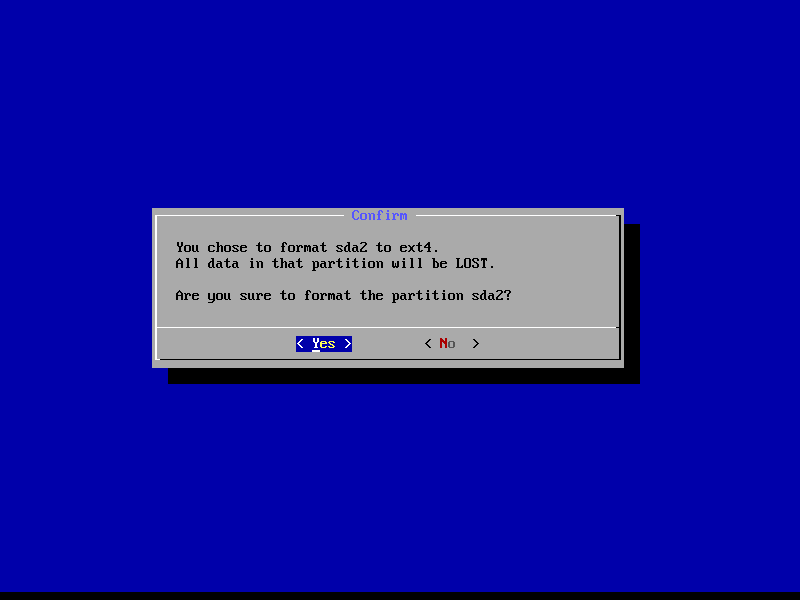
Once the installer boots, you will be asked to select the target install partition. For MBR (legacy) setups, this is normally the only partition on the device, so select it and choose EXT4 when asked if you want to reformat.
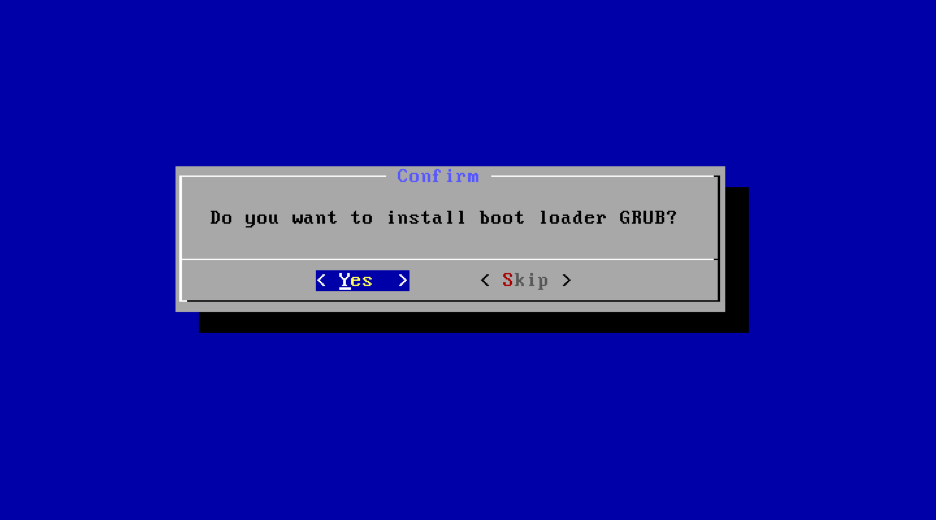
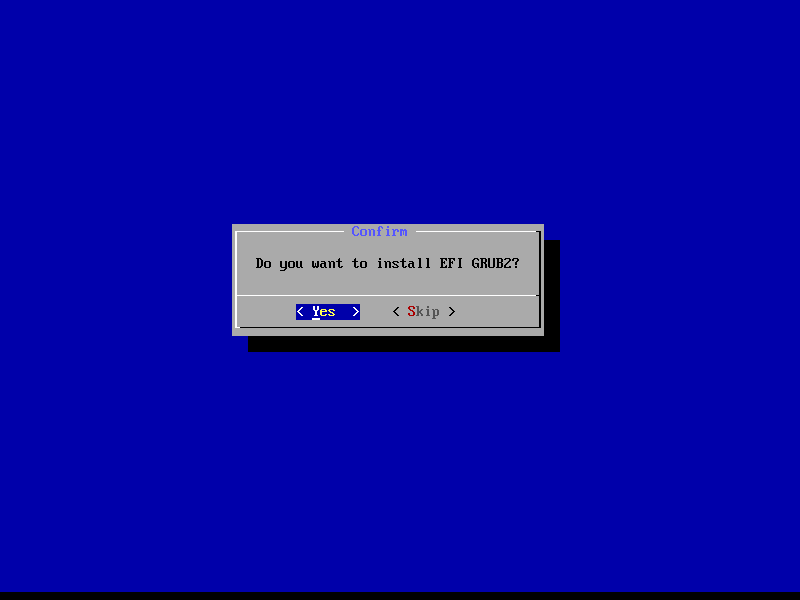
Choose "Yes" when prompted about the GRUB bootloader:
The installer will begin to write the changes to the disk. Following that process, you will be asked if you want to setup the install for OTA (A/B) updates. Select Yes if you want to use OTA updates or recovery updates in the future. This will take some time. Go grab a coffee!

Congratulations! You should now have a functional dual-boot with Bliss OS!
Install Bliss OS On Your Windows Partition
If you are looking for a GUI based installer for Windows, we do include one in some of the .ISO's we produce, but we do have our own option for Windows installer documentation that can be found here: Using The Windows Installer
When booting into the installer, choose "Installation - Install Android-x86 to harddisk":
Once the installer boots, you will be asked to select the target drive. Choose the NTFS drive that houses your current Windows install. You do not need a separate partition, as the installer will create an image on your Windows partition.
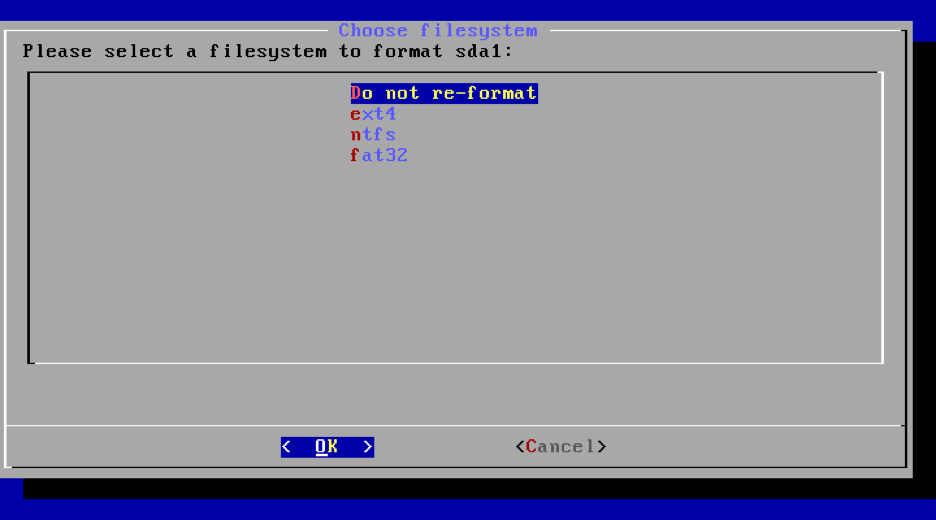
Choose "Do not re-format" on the next screen. It is important that you choose "Do not re-format", as any other option will cause the installer to continue with the
Choose "Yes" when prompted about the GRUB bootloader:
The installer will begin to write the changes to the disk. You may be asked if you want to setup the install for OTA (A/B) updates. Select NO for this install type as OTA is not supported for NTFS installs. This will take some time. Go grab a coffee!
Then the installer will ask you how much space you want to allocate for the data image. Most users choose 8 GB, 16 GB, or 32 GB.
Congratulations! You should now have a functional dual-boot with Bliss OS!
Install EFI From Bootable USB
Download Bliss OS
You can download a stable Bliss OS build by clicking on the link here, non-stable builds can be found here. Please make sure you are downloading the latest .iso and not the OTA update .zip.
Flash iso to USB drive
We recommend flashing the iso to a USB drive using Rufus or Belana Etcher, usong default options for each. These images are not compatible with Ventoy.
Install Bliss OS
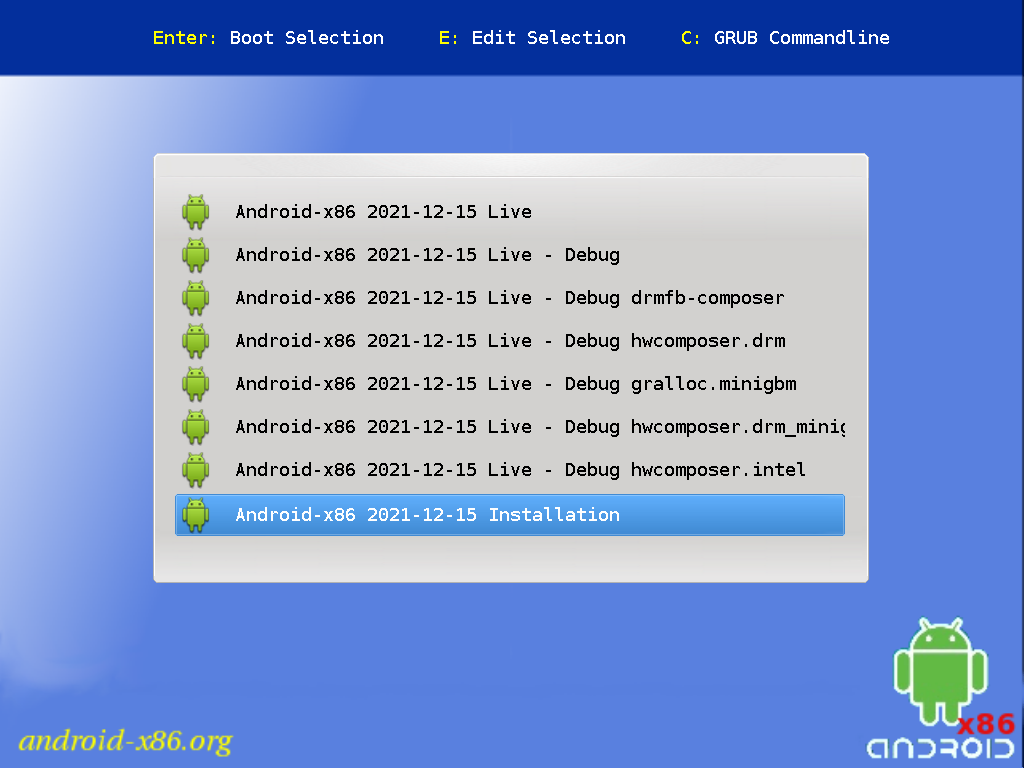
When booting into the installer, choose "Android-x86 ... Installation":
Setting up A New Partition:
!!(WARNING: This is only needed if you intend to wipe everything from your PC and install Bliss OS only)!!
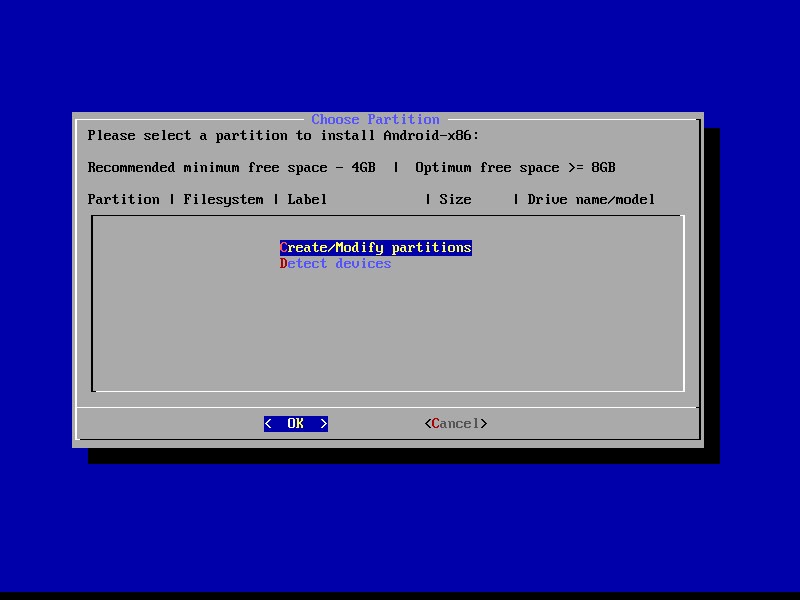
Once booted into the installer to setup your install as a new drive, you will need to select "Create/Modify partitions"
WARNING THIS WILL DELETE ANY DATA ON THE DRIVE
In the next screen, we need to remove all existing partitions on the device and make two new partiitons for this to work, as Bliss needs to install a bootloader to boot to. if you have a pre-existing install of linux, this step may be unnecessary.
First create the EFI partition, this is the partition that is used to install the bootloader.
- Create a [ new ] partition
- leave First Sector default (Just press enter)
- for "Size in Sectors" all we need to do is enter
+512M - Set type as ef00
- We don't necessairly need to name this partition, but it is best practice to name it
EFI
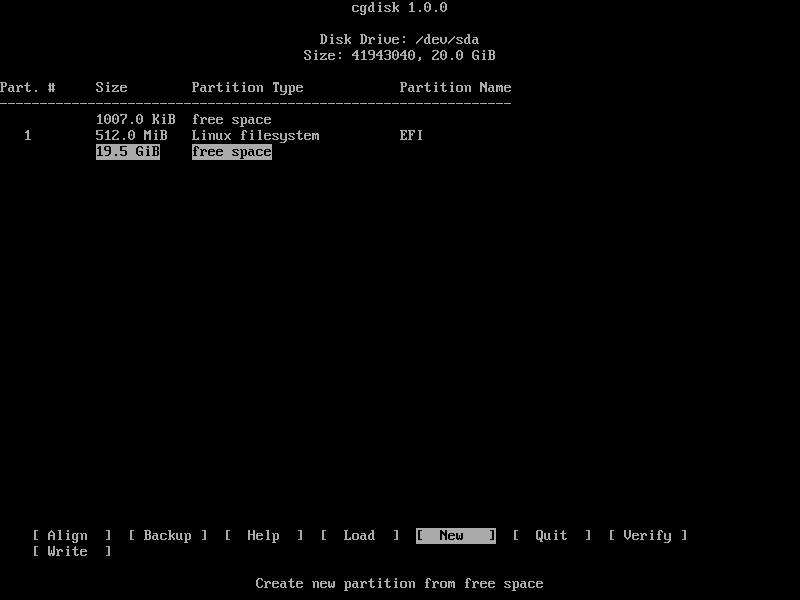
Next we need to make the second partition this is the partition that the bulk of android will be installed to.
- press down until the largest chunk of free space is slected, and click [ NEW ]
- We can leave everything default. Although a name is not necesary we can call it ANDROID.
- Lastly we click [ WRITE ] and [ QUIT ]
Installing On Existing Partition
Once the installer boots, you will be asked to select your target ESP (EFI) partition first (Usually the first partition in the drive, around 500mb-2gb).
You will then need to choose what drive to install it too, this could be a pre-existing partition or the partition you created above. Select that larger target partition and format it as ext4.
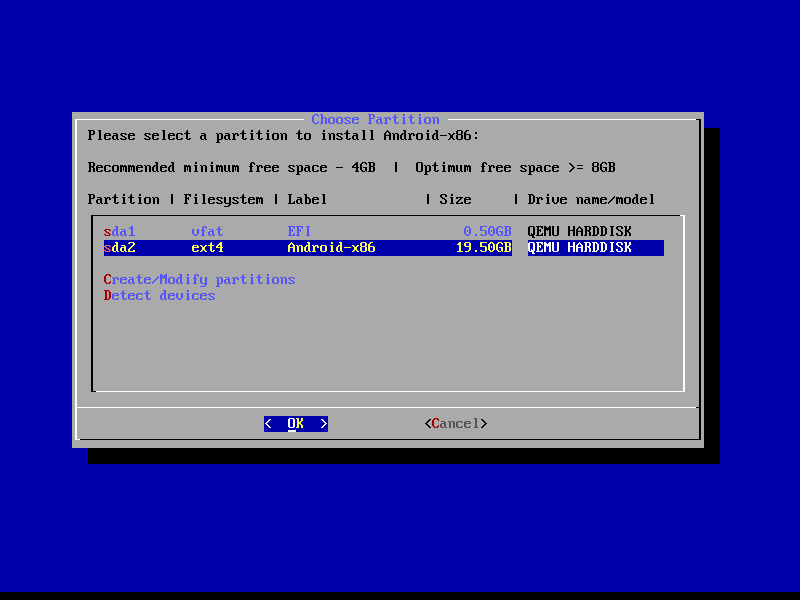
This is the recomended format. Click < Yes > on the next screen
The installer will procede to format and install android, you will then be prompted to install EFI GRUB2. we need to accept that, unless you have a pre-existing grub or other bootloader install
The installer will begin to write the changes to the disk. You might be asked if you want to setup the install for OTA (A/B) updates. Select Yes if you have a large enough drive to handle the system taking up twice as much space. This will take some time. Go grab another coffee!
Congratulations! You should now have a functional UEFI-boot with Bliss OS!